- Streaming Products
- BD-DVD products
- Useful Articles
- support
Article Editor: Young leaves
Jan 01, 2026
Experience the best music converter now!
Share this article!


Many people want to save their favorite music to a USB memory stick to use as a backup or to enjoy offline playback in the car. However, in reality, many people face various problems, such as "music files are not recognized," "I want to save Amazon Music songs to a USB but it doesn't work," or "I don't have a computer at hand."
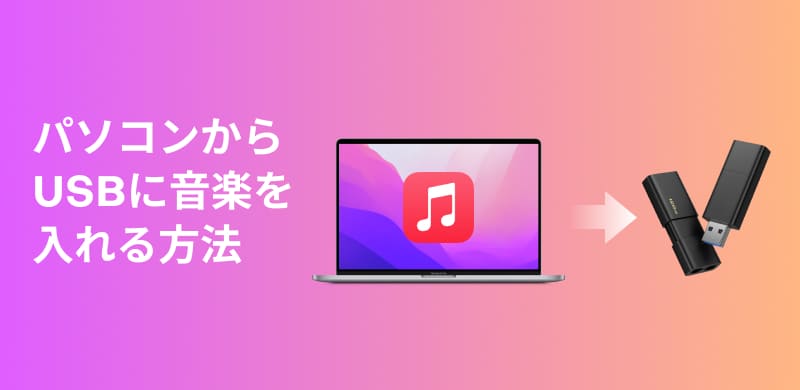
This article will explain in detail how to transfer music from a computer, smartphone, or CD to a USB flash drive. We will also introduce a method that can be used even if you do not have a computer. All methods are easy to understand, and even beginners can put them into practice right away, so please read to the end.
Related Posts:
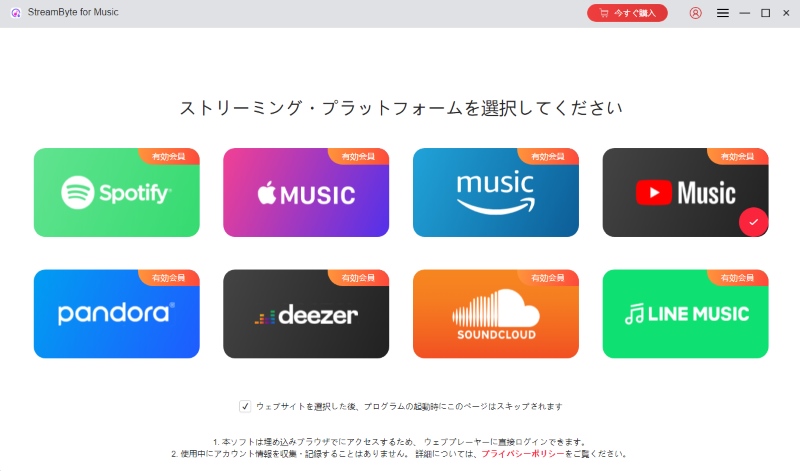
To save music from your computer to a USB flash drive, you must first download the music files to your Windows or Mac computer. Songs downloaded from music streaming services are usually DRM-protected, so they cannot be saved directly to external devices such as USB flash drives. If you want to save music downloaded from services such as Spotify, YouTube Music, and Apple Music to a USB flash drive, you can use professional music conversion software.StreamByte for MusicWe recommend using ".
"StreamByte for Music" is compatible with both Windows and Mac and supports many streaming music services.Remove DRM protectionThe music files can then be converted to formats compatible with USB flash drives, such as MP3, AAC, or WAV, and saved to your computer. This allows you to play the saved music offline or transfer it to devices like smartphones, USB flash drives, or CDs. The software also features a built-in web player, allowing you to search for and save songs directly. High-speed downloads at up to 35x speeds are possible while maintaining the original sound quality, providing a smooth music downloading experience.
You can experience all the features of "StreamByte for Music" for free, so please download it and use it.

StreamByte for Music
This is the perfect music converter for those who want to enjoy streaming music with the original sound quality. It supports multiple music platforms and allows you to save music while maintaining high sound quality.
Main features and recommended points of StreamByte for Music
Steps to download and save music to your PC using StreamByte for Music
Below, we will explain in detail how to use "StreamByte for Music" to download music to your PC and put it on a USB memory stick, using YouTube Music as an example.
step 1Download and install "StreamByte for Music" on your computer and run it. After logging in, you will enter the main interface and select YouTube Music. Once you access YouTube Music, log in with your account.
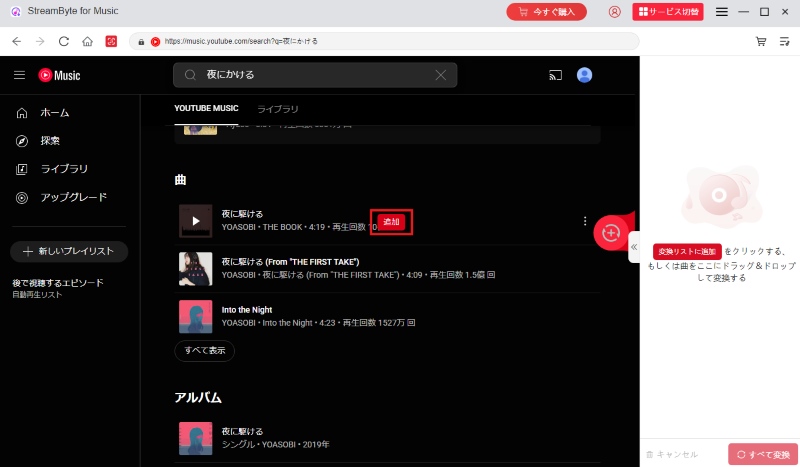
Step 2Search for the music you want to put on your USB. Click "Add to Conversion List" on the cover of the song or playlist you like, or drag and drop it to the right sidebar to add it.
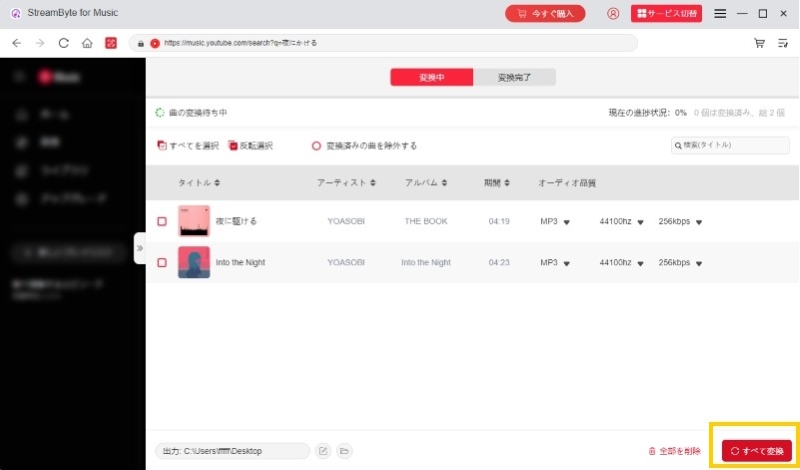
Step 3After adding the songs you want to save to USB, open the conversion list screen on the right. There you can set the output format and audio quality of the music. Once you're done, click the "Convert All" button to start downloading the music.
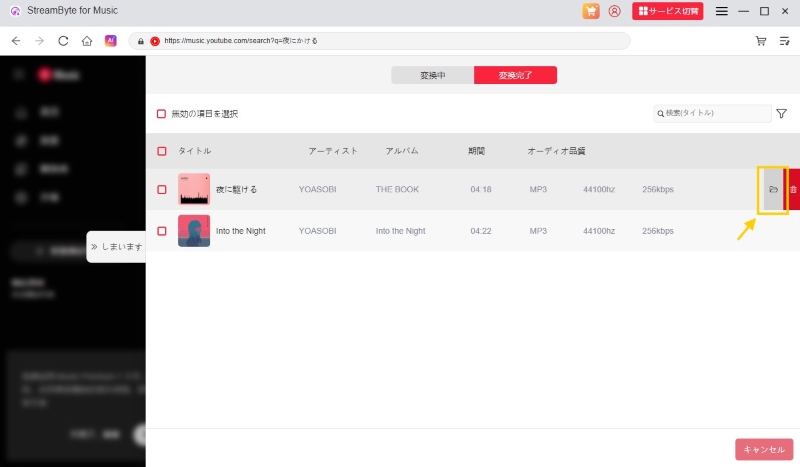
Step 4You can check the progress of the music download on the conversion screen. Once the download is complete, go to the "Conversion Completed" tab and click the folder icon to view the music files saved on your PC, or transfer them to a USB drive.
By following these simple steps,StreamByte for Music"Download YouTube Music songs to your computerThis software supports a variety of music streaming services, including YouTube Music, Spotify, Apple Music, and Amazon Music. It can also convert music to common formats like MP3, FLAC, and WAV, making it easy to save on a USB flash drive for easy portability. If you want to save your favorite music to your computer in high quality and at high speed, be sure to download "StreamByte for Music" for free and experience its features.
100% safe and virus free
100% safe and virus free
The method for transferring music files stored on your computer to a USB memory stick varies depending on the operating system. Below, we will explain how to save music files to a USB memory stick on a Windows PC and a Mac.
How to easily save music to a USB flash drive in Windows
Using Windows Explorer, you can easily save files to a USB flash drive by simply dragging and dropping them without the need for any special software or tools. The detailed steps are as follows:
step 1Connect the USB memory to your Windows computer. When you open Windows Explorer, you will see an icon for the USB memory.
Step 2In File Explorer, select the music files you want to transfer to the USB, then click and drag them with your mouse.
Step 3Drop the file onto the USB memory icon to begin transferring the music file.
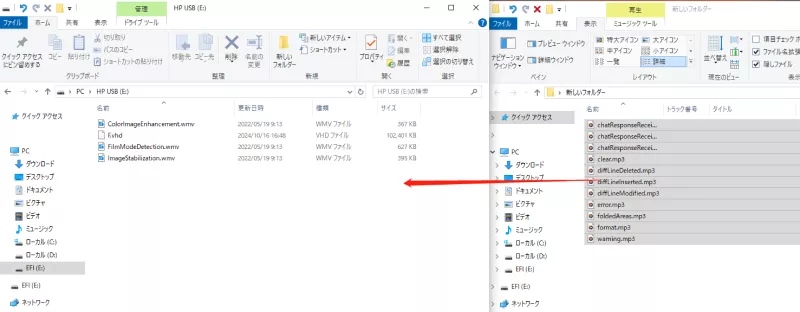
Step 4Once the transfer is complete, open the USB memory stick in File Explorer and check that the music files have been saved correctly.
How to put music files saved on a Mac onto a USB drive
On a Mac, you can easily copy music files to a USB flash drive using Finder. Follow the steps below.
step 1Insert the USB memory into the USB port on your Mac.
Step 2Open Finder and find the music files you want to transfer to your USB memory.
Step 3Once you find the music files, select them and drag and drop them onto the USB memory icon to start copying the music files.
In Windows, you can use the standard Windows Media Player to transfer music files from a CD to a USB flash drive via your computer. The following are the detailed steps.
step 1Open Windows Media Player and insert the CD into your computer's CD drive. The CD will be loaded automatically. If your computer does not have a built-in CD drive, you will need to use an external CD drive.
Step 2Once the CD has finished loading, select the music files you want to save to the USB memory.
Step 3Right-click the CD name in the navigation bar on the right side of the screen and select "Rip CD to Library." This will load the music files from the CD onto your computer.
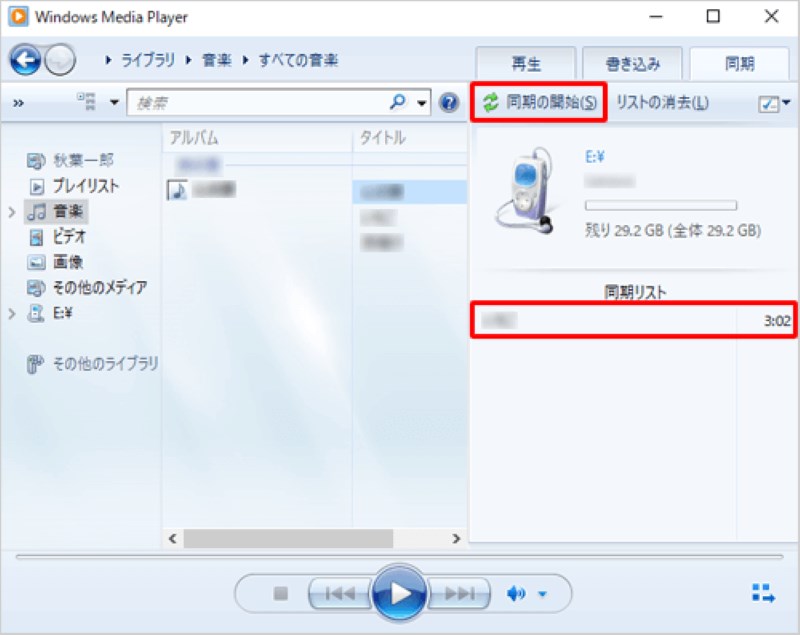
Step 4Connect the USB memory to a USB port on your computer. Click the "Sync" tab in the upper right corner of Windows Media Player, and information about the connected USB will be displayed on the right.
Step 5Select the music files from the CD you ripped and drag and drop them onto the USB memory on the right. Finally, click "Start Sync" to begin the transfer.
step 1Connect an external CD drive to your Mac and launch the Music app.
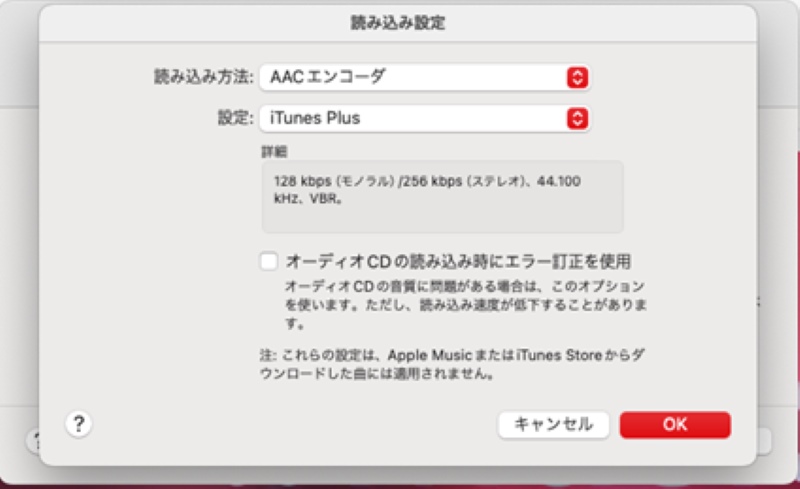
Step 2Choose "Music" > "Preferences" from the top menu, open the "File" tab, open "Import Settings," and select your preferred format. Then insert the CD into your drive.
Step 3Once the CD has finished loading, connect the USB memory to your Mac. Select the songs you imported in the Music app and drag and drop them onto the USB memory icon to transfer them.
While there is a way to transfer music files directly from your smartphone to a USB flash drive without a computer, copyright restrictions mean that transferring files directly from an iPhone to an external device is restricted. Please note that if you want to transfer music from your smartphone to a USB flash drive, you will need to purchase a dedicated USB flash drive or conversion cable separately.
step 1Connect the USB memory to your smartphone using an OTG cable.
Step 2Open the "Files" app on your Android smartphone and select the music files you want to save to the USB.
Step 3You can copy or move it to "USB Storage" from the Share/Move option.
step 1Connect the Lightning to USB adapter to your iPhone and then connect the USB memory stick to the adapter.
Step 2Open the "Files" app on your iPhone, select the music you want to put on the USB, and tap "Copy."
Step 3Return to the "Files" app screen, select the memory card under "Locations," and tap "Paste" to transfer music to the USB memory.
No, it's not illegal in principle. Backing up music to a USB flash drive for personal enjoyment and playing it on a car audio system is generally not considered illegal. However, uploading it to social media or selling it constitutes copyright infringement. To avoid legal issues, please use subscription music stored on a USB flash drive only for personal use.
The number of songs you can store on a USB memory stick depends on its capacity. For example, a 32GB USB memory stick can store approximately 3,200 songs (MP3 format, assuming each song is 10MB). If you use a USB memory stick with a larger capacity, you can store even more songs.
The main music file formats supported by USB memory sticks include MP3, AAC, and WAV. Among them, MP3 is the most popular, with a small file size and widely supported by car audio systems and many other devices. WAV is an uncompressed format with high sound quality, but please note that the file size is large.
If you want to transfer your favorite streaming music to a USB flash drive, we recommend using the professional music conversion software "StreamByte for Music." It can easily convert music to various USB-compatible formats, including MP3, AAC, WAV, and FLAC.
In this article, we've introduced how to save music from your computer, smartphone, or CD onto a USB memory stick. If you're using a USB memory stick to play music in your car, we recommend using a file format that supports common formats such as MP3 or AAC. Also, songs downloaded from music distribution services such as Spotify and Amazon Music are DRM-protected and cannot be transferred to a USB memory stick. In such cases, we recommend using a "StreamByte for MusicWe recommend using ".
"StreamByte for Music" supports multiple popular music streaming services both in Japan and overseas, and allows you to convert and save your favorite songs to versatile formats such as MP3, AAC, and FLAC. Converted music can be freely transferred to your preferred device, such as a smartphone, CD, or USB memory stick. It also includes a function to edit and save ID3 tag information, making it easier to organize and manage your music. A free trial version of "StreamByte for Music" is available, so please give it a try.
100% safe and virus free
100% safe and virus free
Born in Tokyo. Studied music culture at Tokyo Woman's Christian University, and after graduating, worked in the music distribution and download industry, gaining experience as an editor and writer. Has a deep understanding of a wide range of music genres, from rock, J-POP, classical, and metal, and is familiar with major services such as Spotify, Apple Music, and YouTube Music.
He has written over 300 articles, with a total of 6 million page views. He strives to provide accurate and easy-to-understand information so that readers can enjoy music more conveniently and safely. He currently writes articles for the StreamByte editorial department, focusing on how to use and utilize music download and conversion software.
Experts in supporting offline listening of streaming music services
Subscribe to StreamByteCopyright © 2026 StreamByte. All rights reserved.

Get the latest news, product upgrades, information, guides, discounts and more about StreamByte.
Please enter a valid email address.